 |
|
 |
|
| Roll your mouse over this image. | |
 |
|
 |
 |
Making the Repair
Now that you are equipped with tools and the ability to diagnose the types of flat tire you may experience, let's learn about making the actual repair. This is a multi-step process, and regardless of whether you will patch or replace the tube, most steps are the same--especially the first and last few. Let's get started!
Step 1: Set-up
You have diagnosed that your tire is flat. In fact, it is kind of obvious. You do NOT want to ride on it and have to replace your rim and tire as well. First, if you are on the bike, get off. Next, get the flat tire tools out of your bag.
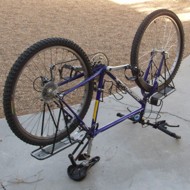
If you're at home, find a flat, at least nearly level surface, such as your patio, garage floor or driveway. If you're on the road or a trail, find a flat, level spot off the trail, so you will be out of others' way. Now, flip your bike upside-down, so it rests on the seat and handlebars. This give you easy access to the wheels, letting you examine and remove them. If by chance you are at home and have a bike repair stand, by all means use that, if you like.
With your bike upside down, spin the wheel with the flat tire slowly to examine it and make a quick diagnosis. Are there any abrasions through the tire? Are there any sharp objects, like tacks or glass, sticking through the tire? Are there any major abrasions to the side walls of the tire?
If you cannot find an obvious source of the air pressure leak, check for a valve core leak before removing the wheel from the bike. Remove the valve stem cap and add air. Put some type of liquid (saliva works great and is always available) into the valve stem. If it bubbles, you have probably found your problem.
Step 2: Remove the affected wheel
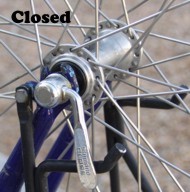
If you have quick-release nuts on your bike, flip the lever to loosen, and maybe rotate it a time or two to loosen it further. If your bike has nuts that require a wrench, use your wrench to loosen the nuts, but not remove them completely.
Disconnect your brake cables from the calipers, so they will spring open. There should be a quick latch on the brake mechanism, for this purpose. There are a few different styles of brakes; find the example to the left that is most like your brake mechanism, and click the image and click for a close-up of how to release it.
All rights reserved
on the next page...